Tag: nobake

No Bake Mango Coconut White Chocolate Cheesecake

On a lookout for a can’t-believe-you-could-pull-this-off Sunday brunch dessert? I have this stunner of a cheesecake for you guys!

Mango season is sadly at its end and this might be the last weekend you’ll be able to enjoy these ambrosial fruits (three cheers for frozen mangoes!). This cheesecake would make the most perfect Sunday brunch dessert as it truly lets mango shine. So easy to put together, it requires no baking or cooking, hence comes together in about 20 minutes. This cheesecake is also egg-free and does not require gelatin or agar agar for it to set. It doesn’t get easier than this people, truly a fool-proof recipe!

The cheesecake has a ginger biscuit base which pairs so well with mangoes, you’ll be pleasantly surprised. The cheesecake filling is made up of white chocolate, coconut cream, lime and mascarpone cheese. These four ingredients combined with mango are truly a match made in heaven. Simple yet so elegant looking and packs a punch. This one is surely going to be a favourite among your friends and family, trust me!

Don’t have fresh mangoes? Fret not. I have tons of customisation options for you to try. Read the recipe notes below.

Have a fabulous Sunday! ?

Print Recipe
No Bake Mango Coconut White Chocolate Cheesecake
Course Desserts
Cuisine Italian
Prep Time 20 minutes
Cook Time 0
Passive Time 4-8 hours
Servings
slices
Ingredients
For base
For cheesecake
Course Desserts
Cuisine Italian
Prep Time 20 minutes
Cook Time 0
Passive Time 4-8 hours
Servings
slices
Ingredients
For base
For cheesecake
Instructions
For base
  1. Blend ginger biscuits and coconut oil in a food processor till fine crumbs form. In a 9-inch loose-bottom tart pan, place the crumb and press towards the sides and down firmly. Press down with flat bottomed glass for a uniform base. Let chill in the freezer till you prepare the filling.
For cheesecake
  1. Without tipping, take out overnight chilled pack/can of coconut milk from the refrigerator. Gently scoop out the thick coconut cream from the top and put it into a large mixing bowl. Store this bowl in the refrigerator till you finish the next step.
  2. Place the reserved liquid from the coconut milk pack/can to a medium-sized, microwave safe glass bowl. Add roughly chopped white chocolate to this bowl and microwave on low-power in the burst of 30-seconds 3-4 times, whisking in between, until the chocolate completely melts. You could also do this step on a double boiler. Whisk in vanilla extract at the end. Let the mix cool on counter and proceed with the following steps in the meantime.
  3. Take out the bowl with coconut cream from the refrigerator. Add mascarpone cheese, zest and juice of a lime, confectioners sugar and salt to it. Whisk on medium-high speed using the beater of the electric mixer until soft peaks form and the mixture is firm for about 2-3 minutes.
  4. Decrease the speed to low and slowly whisk in melted chocolate mix to it, until just combined. Do not overmix.
  5. Take out the tart pan from the freezer, top the ginger base with the cheesecake filling and refrigerate covered with cling film overnight for 4-8 hours.
  6. An hour or so before serving, peel and thinly slice 2 chilled mangoes. Arrange the mango slices in a circular, overlapping fashion (as seen in picture) on top of the cheesecake and return to refrigerator to rest until serving time.
  7. The cheesecake will keep in the refrigerator, stored in an airtight container, for about 3-4 days but tastes best on first day.
Recipe Notes

*You could a create number of variations using this recipe as a guide.
*Ginger biscuits could be replaced with digestive biscuits for a more subtle flavour profile.
*You can easily swap white chocolate with the good quality dark chocolate + some cocoa powder (sans the lime).
*Mango could be replaced with any other seasonal fruit of your choice. Fresh strawberries (or any other berry!), peaches, cherries and kiwi would be especially lovely or combination of fruits to create a beautiful fruit medley!

So many possibilities guys!

Share this recipe:

L.O.V.E. Wraps

L.O.V.E. Wraps1


I know you think that my blog has sort of turned into a baking blog with a savory recipe seldom thrown here and there which again involves some sort of baking! (Humph.. Do I make sense?) So after throwing so many sugar-laden desserts week after week, I thought a savory recipe for brunch or breakfast (which does not involve baking) would be a great way to redeem my past actions. And when the recipe is so healthy, no-carb and wholesome, I’m sure many of you’ll be ecstatic.

With this recipe, turn your regular scrambled egg breakfast into a fancy brunch dish. With summer upon us, we require as many quick-fixes as possible. I mean, who wants to turn on the oven or spend time in the kitchen slogging over the heat! Low-fat and clean eating becomes a necessity when days are so hot and humid. This recipe absolutely fits the bill as an all-rounder meal suitable for breakfast, brunch, lunch and dinner.

This dish is so colorful because of zucchini, carrots and broccoli. As for the recipe, these are the measurements I followed but this dish does not require following a recipe to the T so feel free to make any adjustments. Use whatever vegetables you have at hand. Go vegetable crazy! Bell peppers and beans would be quite awesome too.

So eat light & have a happy happy weekend!
xo


L.O.V.E. Wraps


L.O.V.E. Wraps

Serves: 2 | Prep time: 10 minutes | Cook time: 10 minutes | Total: 20 minutes

Ingredients:

  • 1 Tbsp Olive oil
  • 2-3 cloves of garlic, finely chopped
  • 1 small onion, finely chopped
  • 1 small head broccoli, cut into florets
  • 1 small carrot, cut into julienne
  • 1 small zucchini, cut into julienne
  • 1/8 tsp red chili flakes
  • 1/2 tsp Italian seasoning (or any seasoning of your choice)
  • 1/2 Tbsp butter
  • 2-3 large eggs
  • 1 Tbsp milk
  • salt and pepper, to taste
  • 4-6 lettuce leaves, washed and dried (any lettuce of your choice is fine)

Directions:

  1. In a skillet, heat 1 Tbsp oil over medium heat. Add garlic and onion to the skillet and saute till golden brown for about 2-3 minutes.
    Add broccoli and carrots and saute for another minute.
    Add zucchini and cook until just warm. We want the vegetables to have crunch and not be mushy. Mix in red chili flakes, Italian seasoning (or seasoning of your choice) and season with salt and pepper. Place this mixture in a small bowl.
  2. Wipe the skillet (used to saute vegetables) with paper towel and heat 1 Tbsp butter in it over medium heat. In a mixing bowl, crack 2-3 eggs and whisk them together with milk until well-beaten. Add pinch of salt and plenty of pepper.
    Tilt the skillet to ensure the entire pan is coated in the melted butter and pour in the eggs. Keep the heat on medium low. When the eggs just start to set, use a flat spatula to slowly scrape sections of eggs, creating folds. Scrape occasionally until the eggs form soft folds; turn off the heat just before they are fully hardened.
  3. To serve, place the scrambled eggs on a lettuce and top with onion and vegetable mixture.
Share this recipe:

Skinny Chocolate Avocado Banana Pudding & Pops – Raw! ~ For Two

Raw Chocolate Avocado Banana Pudding1


Raw Chocolate Avocado Banana Pops1


Okay, so I”m ashamed to EVEN call this a recipe but in actuality it is! However simple it might be. Sometimes simple is all we need. Simple is beautiful. We are experiencing summer at full force and I want to spend minimum time in kitchen that too away from stove and oven. Of course, still wanting extraordinary food to appear magically on my plate so I’m all about quick recipes nowadays. Cold salads, iced coffees/teas, cold cereal, smoothies and frozen fruit treats are what my days are made of.

A raw pudding. And pops. Same ordinary ingredients with just a bit of tweaking gets transformed into two incredibly delicious desserts. Desserts which are healthy and skinny at the same time. All you need is a high-speed blender. And some chocolate, cocoa powder to be specific. And avocado and banana. Avocado-haters, do not fret. You can not taste avocado. Promise! My husband truly hates avocado from the bottom of his heart, if used in anything other than guacamole and he couldn’t tell! Yes, I didn’t tell him beforehand and he couldn’t make out. Win! Also, you can totally have these for breakfast! 😉


Raw Chocolate Avocado Banana Pudding2Raw Chocolate Avocado Banana Pops2


Each recipe serves two but you can easily double, triple or quadruple the recipe to serve more people or have bigger portions. Stay cool this summer with these cool recipes up your sleeves!

Happy Monday you all!

Raw Chocolate Avocado Banana Pudding:
Serves: 2 | Prep time: 2 minutes | Chill time: 3-4 hours
Ingredients:
  • 2 Tbsp unsweetened cocoa powder
  • 1/4 tsp instant coffee powder
  • 1/8 tsp ground cinnamon
  • Pinch of salt
  • 1/2 ripe (large) avocado
  • 1/2 ripe (large) banana (fresh or frozen)
  • 3 Tbsp honey/maple syrup/date syrup
  • 1/2 tsp vanilla extract
  • 10-12 dices of fresh, ripe mango, for garnish

Directions:

Place all the ingredients in a blender (place dry ingredients in the bottom so they don’t stick to the sides of the blender) and whip till you get completely smooth consistency. Divide the pudding between two ramekins/bowls and refrigerate covered for at least 3-4 hours. Serve, topped with mango dices.

*Consume the pudding within 1 day of making it.
*Instead of mango, you may use strawberries/raspberries.

Raw Chocolate Avocado Banana Pops:
Serves: 2 | Prep time: 2 minutes | Chill time: 8 hours/overnight
Ingredients:
  • 2 and 1/2 Tbsp unsweetened cocoa powder
  • 1/4 tsp instant coffee powder
  • Pinch of salt
  • 1/2 ripe (large) avocado
  • 1/2 ripe (large) banana (fresh or frozen)
  • 1/4 cup honey/maple syrup/date syrup
  • 1/2 tsp vanilla extract
  • 1/4 cup water

Directions:

Place all the ingredients in a blender (place dry ingredients in the bottom so they don’t stick to the sides of the blender) and whip till you get completely smooth consistency. Divide between two Popsicle moulds. If you do not have Popsicle moulds then divide between two paper cups like I did and cover with tin foil, poke the center of the foil with the Popsicle stick. Chill in freezer for at least 8 hours/overnight, demould and serve immediately.

P.S. Want to make these Pops even more chocolaty? Cover them with the chocolate magic shell just like a professional by following this easy-peesy tutorial.
P.P.S. Use white chocolate for these Pops! 😉


Share this recipe:

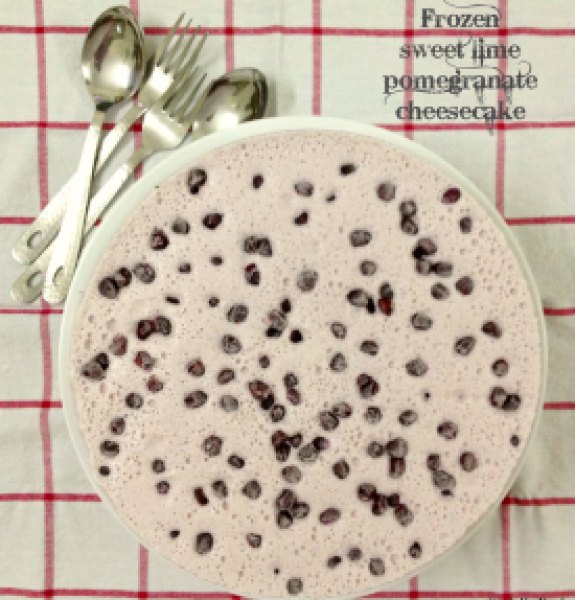
Frozen Sweet Lime~Pomegranate Cheesecake

Frozen Sweet Lime~Pomegranate Cheesecake1

You know how much I love cheesecake… It is my go-to comfort food more often than I would like to admit. Happy days and stressed days equally call out for cheesecake around here! I’m very finicky about my cheesecakes. Till now my most favorite has been a blueberry cheesecake from a particular cafe. It is heavenly and just how I like my cheesecake to be. And I would never dare to make one in my house as long as that cafe exists!
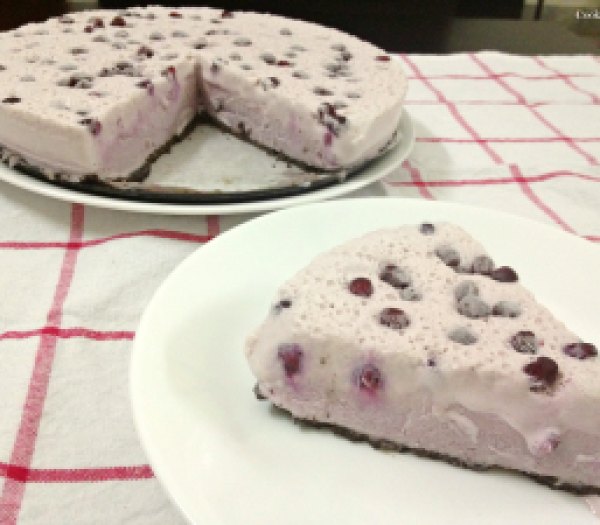
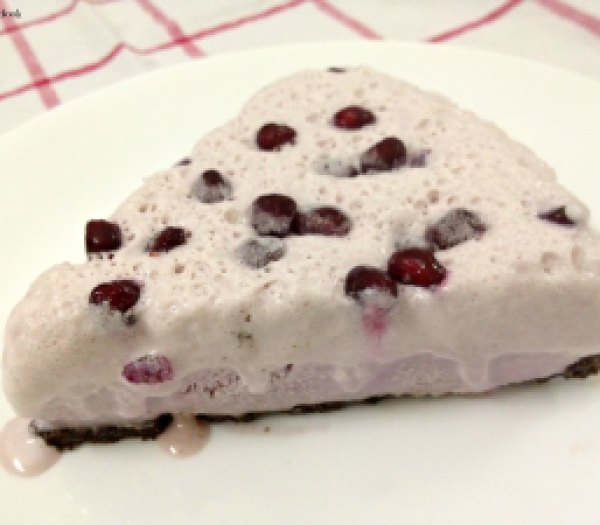
After trying and making so many different varieties of cheesecakes, I decided to whip up this no-bake, gelatin-free, creamy, cheesy, frozen dessert. Let me simplify this for you. This dessert is nothing but a cheesecake ice-cream which is layered over a salty, buttery, chocolaty crust.
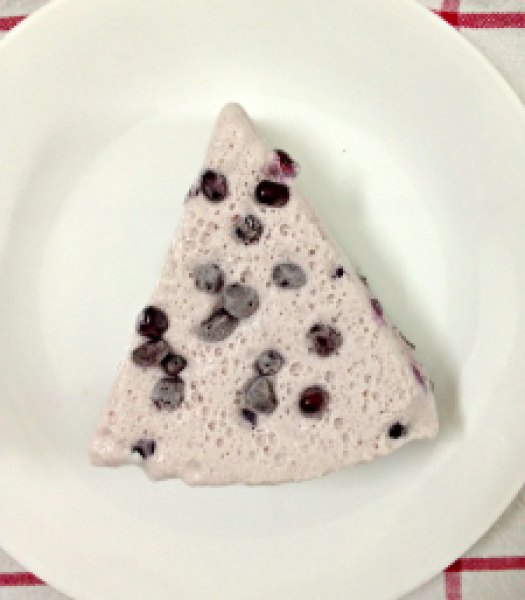
My refrigerator was bursting with sweet and juicy pomegranates. It was a flavor I had never tried before in a cheesecake. I thought it would make a delicate and lovely pairing with cream cheese. To make things tangy, I used up zest and juice from a sweet lime. The result was such a gorgeous baby pink color cheesecake! I just fell in love with it 🙂
Frozen Sweet Lime~Pomegranate Cheesecake3
I went sweet and salty route this time. The crust for this cheesecake is made with chocolate Oreos, butter and just a pinch of salt. This salty kick enhances the cheesecake flavor to another level. If you’re not a fan of sweet-n-salt, feel free to skip the salt as it will still taste divine! But I highly recommend salt as it is not too over-powering. So promise me you’ll add it to know what I’m REALLY talking about… You’ll thank me! 😉
Frozen Sweet Lime~Pomegranate Cheesecake2
Frozen Sweet Lime~Pomegranate Cheesecake4
I made a big batch as I was having company but you can easily halve the recipe and make it in 4-inch spring-form pan. The frozen cheesecake tastes best when eaten within 12-15 hours of being made. It becomes harder and icier the more it stays in the freezer. In case of leftovers, let it thaw for 15 minutes before serving.
Frozen Sweet Lime~Pomegranate Cheesecake with Salted Oreo Crust
Makes: 10-12 slices | Prep time: 20 minutes | Cook time: 0 minute | Chilling time: 4-5 hours
Ingredients:
Crust:

  • 15 chocolate Oreos or any chocolate sandwiched biscuits
  • 3 Tbsp melted butter
  • 1/4 tsp salt
Cheesecake Filling:
  • 3 pomegranates
  • Zest and juice from 1 sweet lime
  • 1/2 cup + 1 Tbsp icing sugar
  • 2 8 oz. package cream cheese, at room temperature
  • 2 cups medium-fat fresh cream (40% fat), chilled

Direction:

  1. Line 9-inch round spring-form pan with parchment paper. Grind Oreos in a food processor until you have fine crumbs. Add melted butter and salt. Spoon the crust and press down firmly over the base using flat base of a glass. Chill in refrigerator while you make the filling.
  2. Remove morsels from pomegranates, save morsels from half pomegranate and juice rest of the morsels with lime juice. Strain the juice into a bowl, add icing sugar and whisk to dissolve.
  3. In a large bowl, take cream cheese and whisk until smooth. Use electric hand mixer/stand mixer for this. Add juice and sweet lime zest to cream cheese and whip till combined.
  4. In a separate bowl, whip the fresh cream till soft peaks form. Gently fold it with cream cheese mixture to achieve a lump-free consistency.
  5. Remove spring-form pan from the refrigerator and spoon the cheesecake filling over the crust. Let it chill in freezer covered in cling film. After 1 hour, sprinkle with pomegranate seeds and return to chill in freezer for another 3-4 hours. Once set, release from spring-form pan, slice and serve. Run the knife under hot water before slicing.

Note: Can be consumed as a sweet lime~pomegranate cheesecake ice-cream if frozen without the Oreo crust.

Share this recipe:

Strawberry Fool & DIY Chocolate Cups

I hope to write a small post! Is that even possible? Humph.. Let’s try and see..

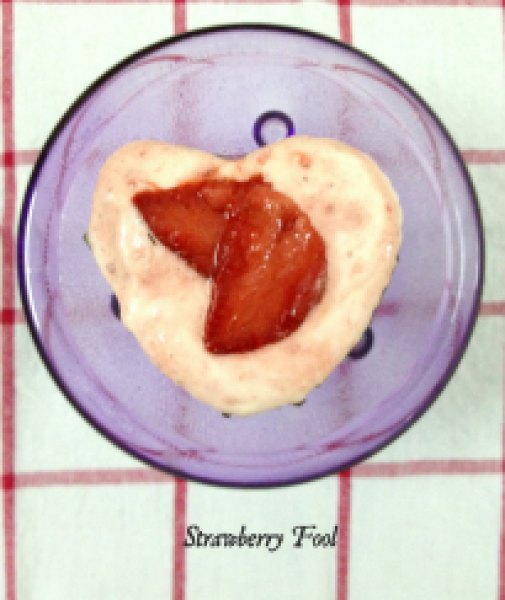
I’m writing about this easiest dessert ever today… It is an English classic! I’m talking about Strawberry Fool.. The name says it all! It is so simple that any fool should be able to make it! No kidding 😀

Strawberry Fool1

The fool ~ this dessert is nothing but sweetened fruit folded into stiffly peaked and slightly sweetened whipped cream. THAT IS IT! Berries work perfectly for this dessert, especially strawberries. Kiwi and rhubarb would be a nice twist too.

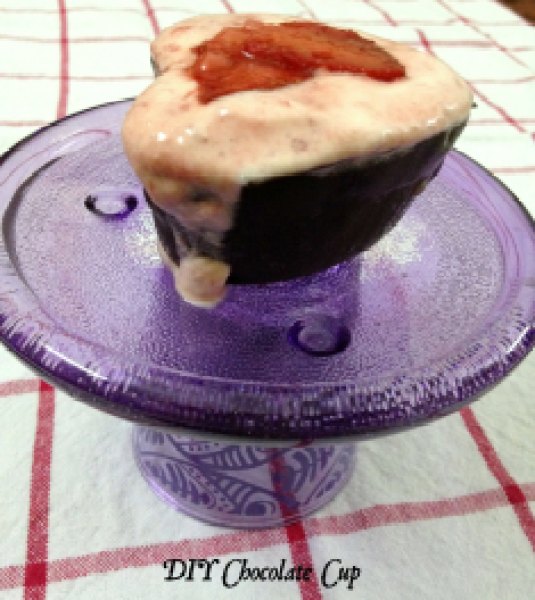
For serving my fool, I made heart-shaped chocolate cups! Do you remember my post “Brownie Bombs“? I had mentioned in that post that even after coating all the cake pops generously I still had some left-over melted chocolate. I had to think on my feet… How to turn this left-over melted chocolate into something amazing and this impromptu idea came to my mind. Very easy to make. All you need is silicone cupcake liners.

Chocolate cups are so easy to make that once you’ve started, it is difficult to stop. You’ll find yourself stuffing them with all sorta yumminess out there! Imagine your favorite peanut butter, ice-creams, mousse and cheesecake served in these edible chocolate cups. Now no need to lick the plate!

Strawberry Fool & DIY Chocolate Cups1
DIY chocolate cup seated on my DIY cupcake stand!

Don’t overfill the cups with fool like I did! 😛

Chocolate and strawberries are match made in heaven. So serving strawberry fool in a chocolate cup makes for a perfect and elegant party-dessert. Chocolate cups can be made ahead and stored in refrigerator for months and strawberry fool is a no-cook, no-nonsense dessert. Perfect for last-minute dessert-fix or midnight-cravings!

P.S. I’m sorry but I do not have step-by-step photos for chocolate cups. As you can imagine my kitchen and hands were covered in chocolate. 😛 But do not worry. These are easy-peesy to make and you will not require my horrible photographic skills to show you that.

DIY Chocolate Cups:

Yields: 4 cups

Ingredients:

  • 50 gm dark chocolate*, melted
  • 4 silicone cupcake liners, frozen for 5 minutes
  • small sheet of grease-proof baking paper

Directions:

For detailed information on how to melt chocolate: Refer to this post

Method-1:

Dip the outer surface of the silicone liner into the melted chocolate. Remove the excess chocolate by giving the liner a slight shake. Ensure that the chocolate coats the liner evenly. Upturn the liner and place it on grease-proof baking paper. Refrigerate for 10 minutes.
Dip the liner again in the melted chocolate to get a thicker layer of chocolate and refrigerate again. Repeat these steps to make 3 more cups.
Once cool, separate the chocolate cups from silicone liners slowly and carefully. Refrigerate till the time of use.
Method-2: For this method a small paint brush will be required.

Paint a thin layer of chocolate onto the inside of each cupcake liner. Refrigerate them for 10 minutes.
Paint a second thin layer of chocolate on top of the first layer and refrigerate for another 10 minutes.
Carefully pop the chocolate cups out of the liners. Refrigerate till the time of use.

* Feel free to use white chocolate or mix of dark and white chocolate.

Strawberry Fool:

Yields: 4 servings | Prep time: 10 minutes

Ingredients:

  • 6 large frozen strawberries, hulled and thawed
  • 3 Tbsp caster sugar
  • 1 cup fresh cream (medium fat 40%), chilled
  • For garnish: 2-3 strawberries, sliced or any cookie of your choice, crumbled

Directions:

  1. Chill mixing bowl and beater in freezer for 5 minutes.
  2. In a food processor, blend strawberries to a smooth puree. Mix 2 Tbsp sugar in the puree and set aside.
  3. Remove mixing bowl and beater from freezer. Add fresh cream to the mixing bowl and whisk. Gradually add 1 Tbsp sugar to the cream and whip till you get stiff peaks.
  4. Fold the strawberry puree in to a whipped cream until nearly incorporated, leaving a few streaks of whipped cream and strawberry puree. Divide the mixture among 4-chocolate cups. Serve immediately garnished with strawberry slices/cookie crumble or refrigerate for up to 2-3 hours.

P.S. Writing a short post requires a skill I don’t seem to possess! Have a happy weekend! 🙂

Share this recipe: