Tag: eggless

Healthy Avocado Chocolate Cake

Healthy Avocado Chocolate Cake1


Let’s take a little flashback. If I talk about my childhood, back then, Diwali meant school holidays, new clothes, bags full of firecrackers, family gatherings, chants from morning & evening Pujas, Rangolis and stuffing our mouths with cardamom, saffron, coconut, mawa, besan and ghee kissed sugary sweets.

I moved out of the house and city once I started going to college. As  being in a medical profession, we were hardly entitled to any leaves let alone a Diwali break. So most of my Diwalis were spent in hostel with friends, missing my family. It had its moments but I missed my family.. A lot…

After college, I immediately got married to the love of my life and from then on, I have been spending Diwali with him and my new family. After so many years, so many things have changed but many things remain just the same like Pujas, Rangolis and family gatherings. My eating habits have changed for good and I prefer making my sweets healthier and low-cal. The recipe I am posting today is one such healthy cake and perfect for the festive season as it is egg-less!


Healthy Avocado Chocolate Cake2


Healthy Avocado Chocolate Cake3


The cake overall has just 2 Tbsp of extra-virgin olive oil. Don’t be surprised! Our secret ingredient here is avocado which compensates for the butter fat. You can’t taste the avocado in the cake as the richness from chocolate masks it completely. Not even pickiest of eater will be able to tell! So make this ultimate soft, moist and super-chocolaty cake for the mother of all the festivals… Diwali!

Light Food means Light(er) You! After all it is a Festival of Lights!

It has been 10 years since I moved out and I still miss my family on each and every festival that I’m not able to spend with them. Enjoy all the time you get to spend with your family and loved ones. Make precious memories to be cherished forever.


cccedb1a438711e3a3c622000a1f9a51_7
Rangoli I made today! Not a masterpiece but still!


Happy and sparkling Diwali to all my readers 🙂

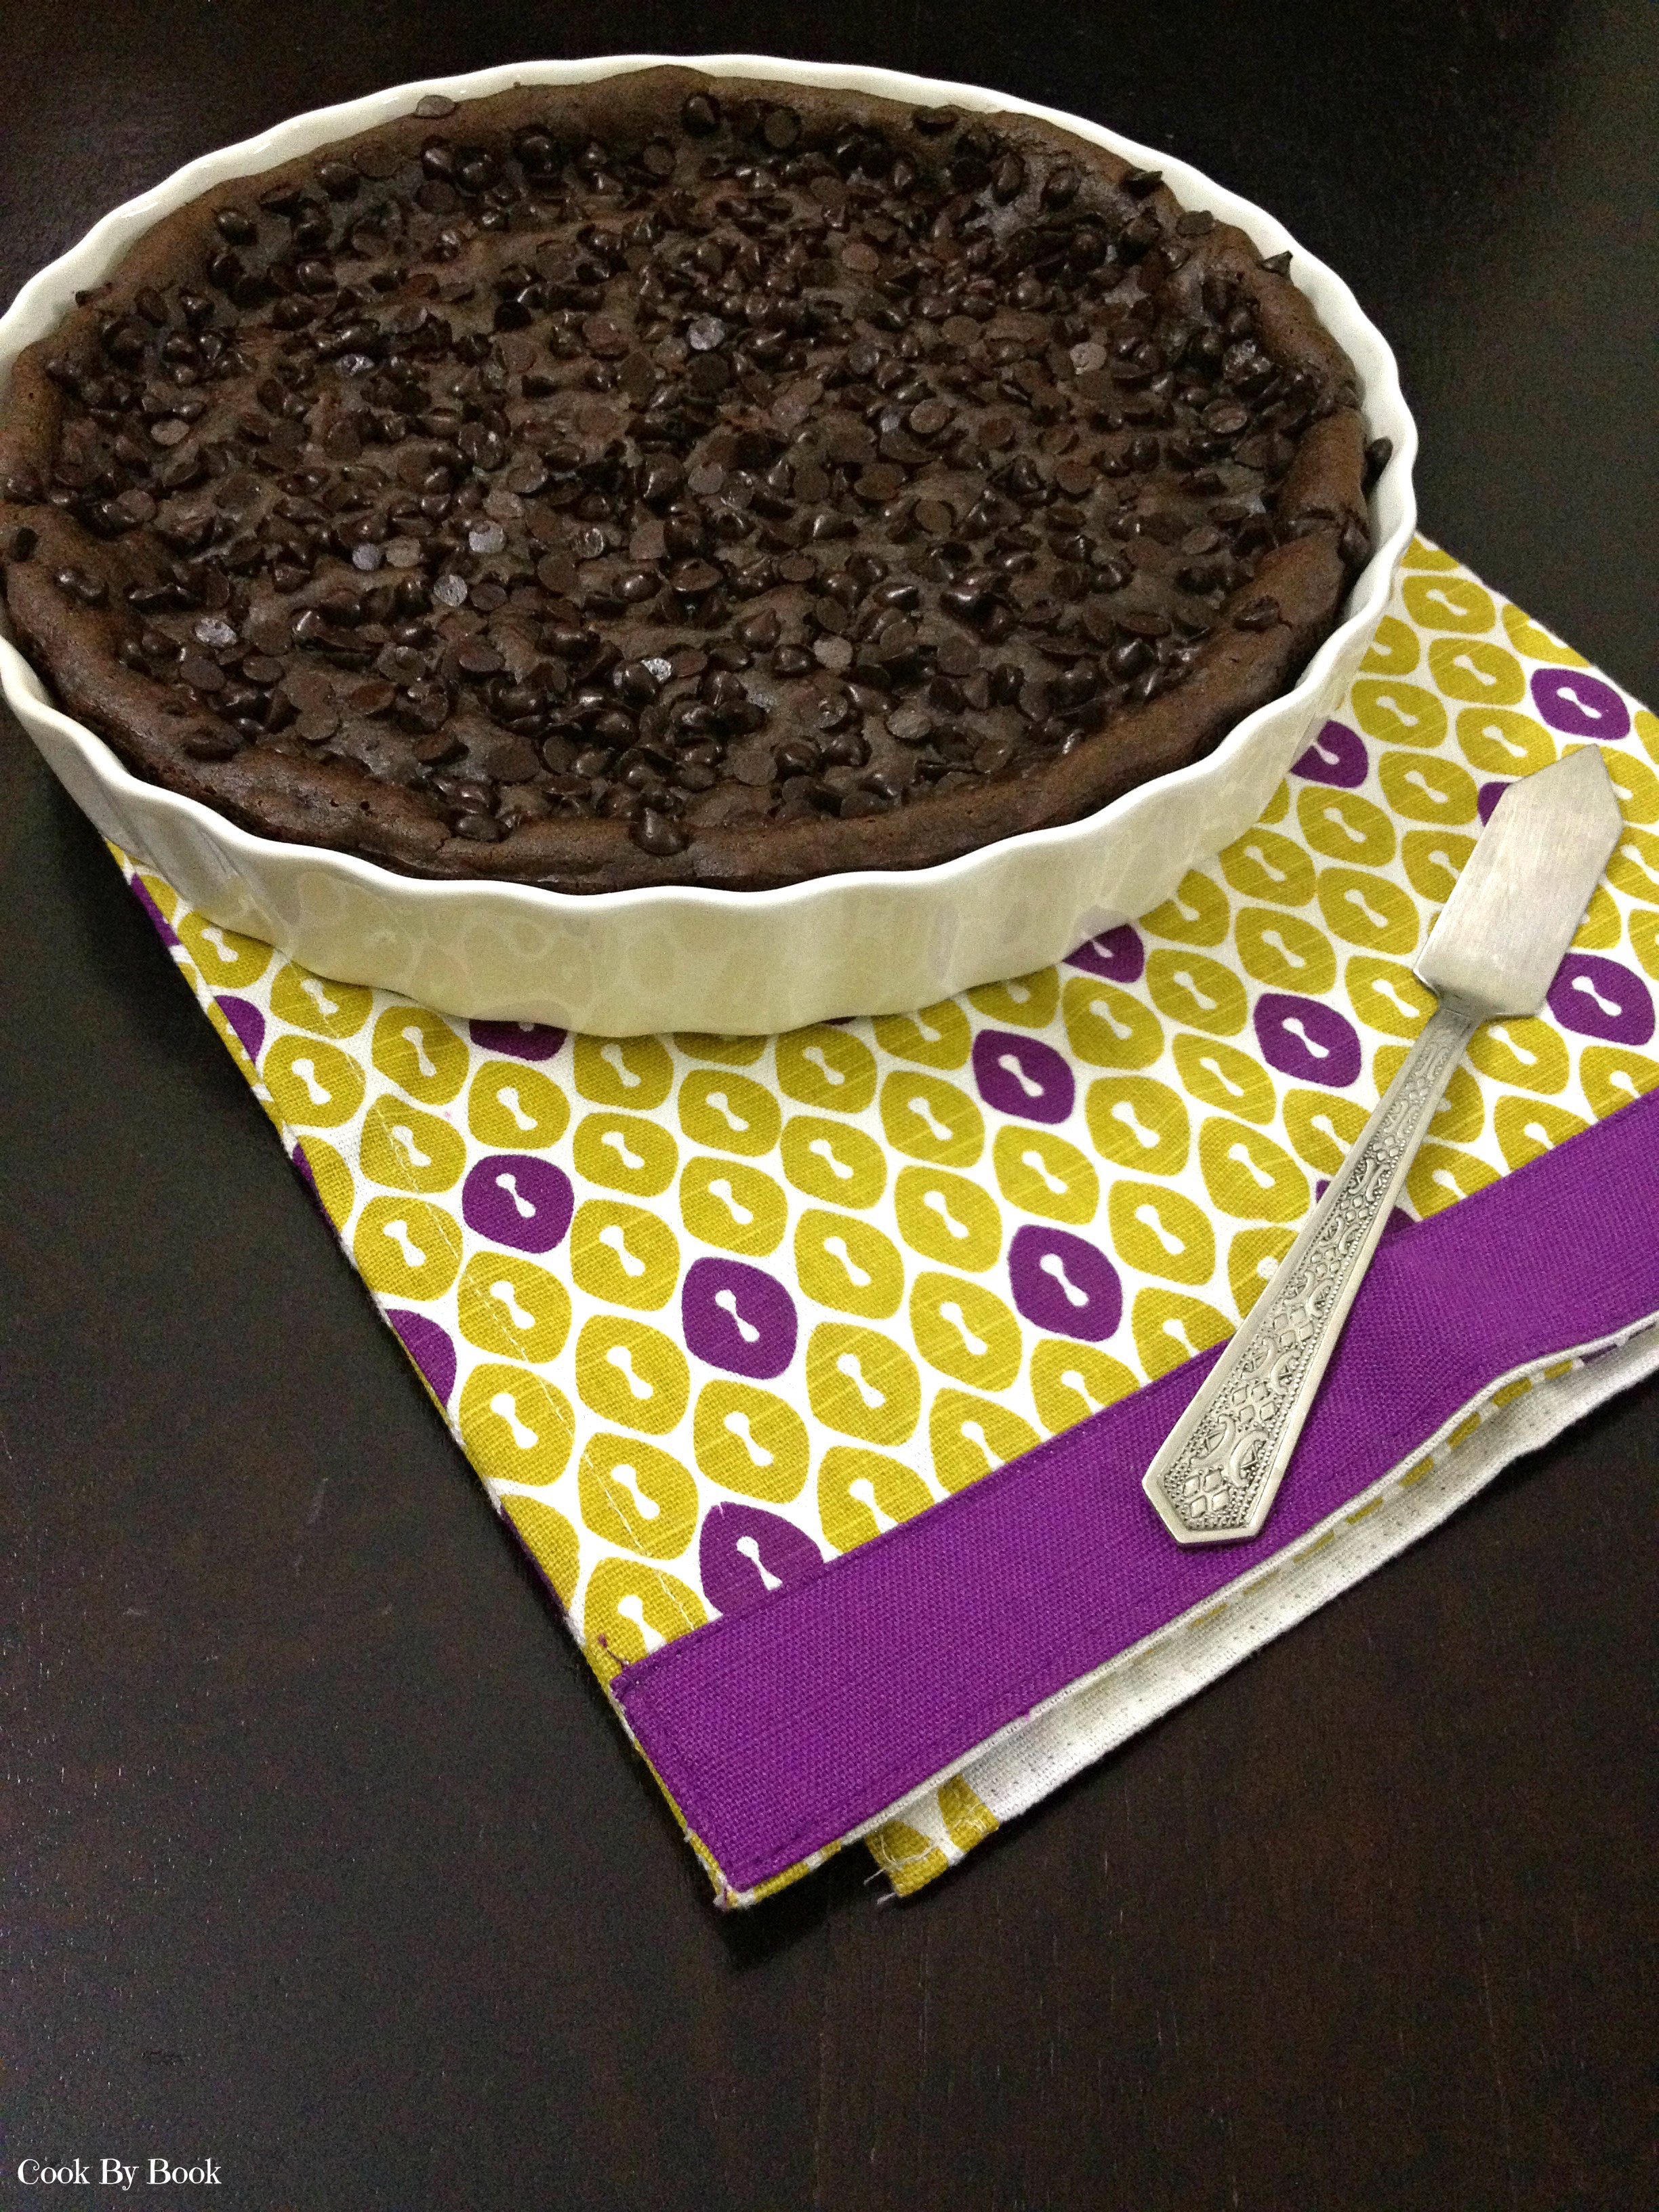
Healthy Avocado Chocolate Pan

Yields: 1 9-inch cake | Prep time: 10 minutes | Bake time: 35 minutes | Total: 45 minutes

Ingredients:

  • 1 1/2 cups whole wheat flour
  • 1/2 cup unsweetened cocoa powder
  • 1 tsp baking powder
  • 3/4 tsp baking soda
  • 1 tsp espresso powder
  • 1/4 tsp salt
  • 1 ripe avocado, pitted, peeled and pureed
  • 2/3 cup honey (I used 1/2 cup honey + 1/4 cup brown sugar)
  • 3/4 cup milk
  • 2 Tbsp extra-virgin olive oil
  • 1 tsp pure vanilla extract
  • 1/2 cup dark chocolate chips

Directions:

  1. Preheat the oven 180°C/350°F. Grease a 9-inch quiche pan.
  2. In a large bowl, sift together flour, cocoa powder, baking powder, baking soda, espresso powder and salt.
  3. In another medium bowl, whisk together avocado puree, honey (or combination of honey and sugar if using), milk, olive oil and vanilla extract.
  4. Make a well in the center of dry ingredients and add wet ingredients in 2 additions. Mix slowly until just combined. Do not over-mix.
  5. Pour the batter to the prepared quiche pan and sprinkle with chocolate chips. Bake in the oven for 33-35 minutes till the toothpick inserted in the center comes out clean. Let cool completely before slicing. Serve as is or with vanilla ice-cream.
Share this recipe:

Baked Apple Cinnamon Doughnuts

Baked Apple Cinnamon Doughnuts1

I’ve got some good news for ya all!!!

I FINALLY bought doughnut pan! Eeeeeeep!!!

I was so EXCITED the day it arrived that I wanted to put it to use immediately (As if it’s any surprise!). The stars and planets united and I was faced with early Diwali gifting occasion.. Happiest me! Without any second thoughts I knew it had to be freshly baked doughnuts.

I wanted to make chocolate doughnuts as my first doughnuts in this pan but these were for gifting so I decided against it. I mean, I can’t trust myself around chocolate and the gift couldn’t be an empty box so, smart move I thought! 😛

With the weather we are experiencing and soooo many apples sitting in my pantry, these adorable beauties were born. And I was absolutely pleased with my decision making ability this time around!

Baked Apple Cinnamon Doughnuts2

They were just So So Good, I wanted to eat the whole batch myself… No kidding!! I mean can you imagine anything better where you can have apple, cinnamon and sprinkles, all together?! Oh… our house smelled Dee-vine!

Needless to say that the doughnuts were so soft and moist plus a healthier breakfast option compared to the store-bought deep-fried version. Win-win!

So buy the doughnut pan right away if you don’t already have it. I got mine from here. You NEED it in your life… Trust me! Plus these make such cute gifts for this festive season too!

Baked Apple Cinnamon Doughnuts3

Baked Apple Cinnamon Doughnuts

Yields: 8 to 9 doughnuts

Ingredients:

  • 1 cup all-purpose flour
  • 1/4 cup whole wheat flour
  • 1/2 tsp baking powder
  • 1/4 tsp baking soda
  • 1/4 tsp salt
  • 1 tsp ground cinnamon
  • 1/4 tsp ground nutmeg
  • 4 Tbsp unsalted butter, melted
  • 1/2 cup white granulated sugar
  • 1 large egg
  • 1 tsp vanilla extract
  • 1/2 cup milk
  • 1 medium granny smith apple, peeled and finely chopped

Glaze:


  • 1 Tbsp melted butter
  • 2 Tbsp caster sugar + 1/2 tsp ground cinnamon, mixed together
  • sprinkles (optional)


Directions:

  1. Preheat the oven to 180ºC/350ºF. Lightly grease the doughnut pan and set aside.
  2. In a medium bowl, mix together flours, baking powder, baking soda, salt, cinnamon and nutmeg. Set aside.
  3. In another bowl, mix together butter, sugar, egg and vanilla extract. Whisk in milk to this mix.
  4. Make a well in the middle of the dry ingredients and add wet ingredients all at once to it. Add finely chopped apples. Stir together until no flour pockets remain but be careful not to over-mix.
  5. With a small spoon, dollop batter into the prepared pan. Fill each doughnut pan three-quarters full with batter. Bake for 11-12 minutes or until doughnuts are puffed up and lightly golden brown. Remove from the oven, allow to cool in the pan for a while before inverting onto a wire rack to cool completely.
  6. While doughnuts are still warm, brush melted butter on each doughnut. Sprinkle some sprinkles on each doughnut followed by cinnamon-sugar.

*These doughnuts are best served the day they are made.
*Feel free to grate the peeled apple if you do not like chopped pieces in every bite!
*Make the recipe eggless by simply replacing egg with 1/4 cup unsweetened applesauce.

Happy Baking!!


Share this recipe:

Skinny Banana Zucchini Chocolate-Chip Buttermilk Pancakes

Skinny Banana Zucchini Chocolate-Chip Buttermilk Pancakes1

Such a long title… huh?!

Don’t get scared!

Today’s recipe is just filled with way too many nice things! 🙂

I love my breakfast so much! That is the best meal of the day for me.. I love it so much that we usually end up having breakfast-for-dinner more often than I would like to admit… not that I’m complaining! I had made these pancakes on one of such nights. They were so so so good!

These healthy yet delectable pancakes are laden with chocolate-chips. Mashed banana and shredded zucchini are folded into the batter for a nutritious breakfast treat. These taste best served the traditional way with butter and maple syrup. If you’re even more calorie-conscious then use the light butter or skip it completely but maple syrup is a must. Because there is hardly any sugar added in the batter itself.

These pancakes have no eggs or butter in them.

Yup… Zero. Zip. Zilch. 😉

They are still quite fluffy, soft and aerated because of these ingredients ~ banana and buttermilk-baking soda. They create magic and make these pancakes possible without addition of butter or eggs.

Skinny Banana Zucchini Chocolate-Chip Buttermilk Pancakes2

Not a zucchini fan? Worry not… Banana successfully masks the tasteless zucchini for you! Trust me… these pancakes will rock your world!

They are so easy to whip up and hardly requires any prep time. The recipe makes enough for a small family and if you’ve any spares than freeze them for quick grab-n-go breakfast! I’m a zucchini fanatic so I love to have them about any time of the day! 😉

So go grab some zucchinis before they disappear!

Skinny Banana Zucchini Chocolate-Chip Buttermilk Pancakes3

Banana Zucchini Chocolate-Chip Buttermilk Pancakes

Yields: around 15 pancakes (4-inch size) | Prep time: 10 minutes

Ingredients:

  • 1 + 1/2 cup shredded zucchini
  • 1 + 1/4 cup whole wheat flour
  • 1 tsp baking powder
  • Pinch of baking soda
  • Pinch of salt
  • 1 tsp ground cinnamon
  • 2 very ripe bananas, mashed with fork
  • 3 Tbsp brown sugar (dark/light)
  • 1 + 1/2 cup buttermilk
  • 1 tsp vanilla extract
  • 3/4 cup dark chocolate chips
  • butter, for greasing the skillet

Directions:

  1. Put shredded zucchini in a cheese cloth or muslin cloth and give it a good squeeze to remove extra liquid.
  2. In a large bowl, whisk together flour, baking powder, baking soda, salt and cinnamon.
  3. In a separate bowl, whisk the mashed bananas, sugar, buttermilk and vanilla together.
  4. Make a well in the center of the dry ingredients and pour in the wet ingredients. Stir to combine and then fold in zucchini.
  5. Heat a large non-stick or cast iron skillet over medium-low heat and grease with butter. Work in batches. pour scant 1/3 cup batter for each pancake into the skillet and sprinkle the uncooked top all over with chocolate-chips. When the edges begin to look dry and cooked and bubbles dot the top, flip and cook until golden on the other side.
  6. Serve hot with butter and maple syrup.
Share this recipe:

Independence Day Special ~ Saffron Pistachio Kulfi

Saffron Pistachio Kulfi1
I seem to have desserts ready for almost all the occasions.. I love love love sugary sweets! When the cravings hit me, it is impossible to shut my brain and there is no turning back till those cravings are satisfied. You must think I’m talking like a crazy or an addict! You’re thinking right! Not that I need a therapy or something… Just saying! It’s 1 a.m. here as I type this post, got a coffee craving which I tried to control and instead ended up snacking on a coffee-almond ice-cream! I know… weak! 🙁 But don’t judge! In my defense, this is the only sweet stuff I have had in a whole day!
You all know I have a sweet corner for ice-creams. So much that not so long ago I even had an ice-cream week on the blog! Check this out! Crazy right?! So it would be impossible that I would let the Independence day be gone without posting a total Desi ice-cream dessert in the honor of the occasion.
Saffron Pistachio Kulfi2
Kulfi is so popular throughout the country. Love of it is unbiased. It is a perfect reflection of our country’s unity despite the cultural diversity! Oh well, I have a way of twisting everything as per my own convenience! I mean only I can talk about kulfi and country being mirror-image of each other or whatever! But I hope you all agree with me on this one.. What better way to celebrate 15th August, our 66th independence day than this ice-cream dessert! I bet it’s a family favorite in every household! 🙂
Kulfi is traditionally prepared by evaporating milk on a low heat with almost continuous stirring to keep milk from sticking to the bottom of the vessel, until its volume was reduced by half, thus thickening it. It is almost like eggless custard turned in to ice-cream. I’ve stuck to the traditional recipe and have refrained from using condensed milk as I somehow detest it! Okay, I sort of hate condensed milk! I guess it’s a night for confessions! Relieved! Humph..
Of course no cliched tricolor desserts people! Hence the recipe for kulfi is has been kept as close to natural as possible. No artificial flavorings or colors have been used. You get a subtle yellow from saffron, crunch from pistachio and aroma from cardamom. It is heavenly! Do try it now and thank me later! 😉
HAPPY INDEPENDENCE DAY!!!
Saffron Pistachio Kulfi3
P.S. No saffron was harmed during the shoot of these photos. It was all returned back to the safety of its jar. So you all can relax now! 😀
Saffron Pistachio Kulfi
Yields: 6 servings
Ingredients:

  • 1 and 1/2 cup full-fat milk
  • 1/4 cup full-fat milk, extra
  • 2 Tbsp cornflour
  • 4 pods of cardamom
  • 1/4 tsp strands of saffron
  • 1/3 cup sugar (adjust as per preference)
  • 1/4 cup finely chopped salted pistachios, plus extra for garnishing
  • 1/2 cup fresh cream (40% fat)

Directions:

  1. In a non-stick/ceramic heavy-bottomed saucepan, add 1 and 1/2 cup milk and bring it to boil on a high heat. Now reduce the heat to low and let it simmer, stirring occasionally to keep it from sticking to the bottom of the vessel.
  2. Warm 1/4 cup of milk in microwave for 10-20 seconds. Add cornflour to it and mix till it dissolves completely. Add saffron strands to it. Separate the cardamom seeds from the pod and powder the seeds with mortar-pestle. Add the powder and pods to the milk. Let this mixture sit aside till the milk is getting reduced.
  3. Once milk has evaporated and thickened till its volume has reduced to half (in about 10-15 minutes), add the flavored milk-cornflour mixture (remove the cardamom pods) slowly to the milk stirring continuously. Add sugar and pistachio and cook for another 2-3 minutes. Taste and adjust sugar as per your preference.
  4. Remove the mixture from heat and let it cool and come to room temperature. Whip the fresh cream till soft peaks are formed. Whisk in the whipped cream to the cooled milk mixture. Pour the mixture in the molds. Refrigerate in the freezer. After about 1 hour of freezing, insert kulfi stick in each mold and freeze for another 4-5 hours. De-mold and serve immediately topped with chopped pistachios (optional).

Notes:

*You can make these without adding cornflour too. It will still taste the same but may melt at a faster rate.

*I did not have kulfi molds hence I used paper cups covered with silver foil. To de-mold, simply cut the paper cup from one side and loosen the kulfi.
*In case you’re using plastic/metal kulfi molds, dip each mold in hot water for 2-3 seconds and then de-mold the kulfi easily.
*Kulfis are best consumed within 2 days of being made. They won’t get spoiled in freezer but will become icy and rock-like if kept for longer duration.
Saffron Pistachio Kulfi4
Share this recipe:

Microwave Chocolate-Nutella Mug-Cake

Microwave Chocolate-Nutella Mug-Cake1

It was a conscious decision to stay-away from this dangerous mug-cake only because of its sheer convenience. I did not need a confirmation that I can make this cake whenever chocolate-cravings hit me.

As all our resolutions come to an end sooner or later, on a particularly depressing morning, I caved in! And it definitely lifted my spirits up instantly! Yaay for broken resolutions! I’m totally hooked to this one and will be definitely trying different versions! 😛

I know there are infinite versions of mug-cakes floating on the web since 2-3 years and I did check out many of them. But I had a few things in mind about how I wanted this cake to be so I ended up making my own version of this sinful dessert. For one wanted this cake to be eggless and a wee-bit healthier so that I don’t feel too much guilty about gobbling it up.

Another criteria was a perfectly soft, moist and fluffy cake. I can’t tolerate dry crumbs. But microwave especially has a tendency to snatch away moisture and make everything dry. So timing here is a key. Do not over-cook it. Check it after 1 minute + 10 seconds. If not done then cook for another 10 to 20 seconds.

It will take you more time to assemble all the ingredients than for it to actually cook! Perfect for unusual cravings or unexpected company! It would be ready in a jiffy! For it to look more posh, make it in a fancy tea-cups/Ramekins and serve it with ice-cream or whipped cream with fresh fruits. Add anything else you want in the batter like chopped nuts, dark/white chocolate chips, butterscotch chips, dried fruits, M & Ms, sprinkles… Tini-tiny pieces of delicious surprise in every bite! Pure happiness!

Microwave Chocolate-Nutella Mug-Cake2

Mouth-watering? Read on to find out how it’s done. Be warned ~ it’s addictive!

Microwave Chocolate-Nutella Mug-Cake

Serves: 1 | Prep time: 2 minutes | Cook Time: 1 to 1 1/2 minutes

Ingredients:

  • 3 Tbsp whole wheat flour
  • 2 Tbsp powder sugar
  • 2 Tbsp unsweetened cocoa powder
  • 1/4 tsp baking soda
  • 1/4 tsp salt
  • 2 Tbsp extra-virgin olive oil
  • 3 Tbsp milk
  • 1 Tbsp Nutella
  • 1/2 tsp vanilla extract
  • M & Ms for topping or 1 Tbsp dark chocolate chips

Directions:

  1. In a medium-sized microwave-safe mug/ramekin add flour, sugar, cocoa powder, baking soda and salt. Whisk with fork until combined.
  2. Add oil, milk, Nutella, vanilla extract and mix with a fork until no lumps remain in the batter.
  3. Sprinkle top of batter with M & Ms or chocolate chips. Microwave on high for 1 to 1 1/2 minutes. Mine was done in 1 minute + 10 seconds so check at that mark and if it is not cooked through then let cook for another 10 to 20 seconds. Be careful as you don’t want a dry cake. Sprinkle with powdered sugar and serve immediately.
Share this recipe: