Ooh-So Healthy Spinach & Cottage Cheese Pancakes

pancakes5

I am a huge fan of breakfast for dinner. Mainly because I love the simplicity of it. Plus our work schedules do not allow us to have an early dinner hence eating light at night is a way to go for me.

My Sunday was jam-packed with activities so I couldn’t stock the fridge for the coming week but luckily my favorite soppu (is a Kannada word & in English it simply means ‘greens’!!) vendor knocked on our door Monday morning to deliver fresh spinach and that saved me an impromptu visit to supermarket. 🙂

I wanted to make something new from this super-fresh spinach but I simply didn’t have time to get my mind around it until dinnertime! I was tired of eating same old Spinach-Cottage Cheese Gravy with flat-bread. Plus I wanted it to be quick (as usual!!! 😉 ) hence I decided to make one simple dish with the combination of Spinach, Cottage Cheese and Flour! And this is how Spinach & Cottage Cheese Pancakes were born! And of course I HAD to healthify them!!! 😉

Serves: 2, Makes around 10 pancakes

Ingredients:

  • 1 bunch fresh spinach rinsed thoroughly and dried, approximately 200 gms
  • 5-6 big cloves of garlic
  • 2-3 green chilis
  • 100 gms cottage cheese
  • salt and pepper to taste
  • 2 Tbsp chickpea flour
  • 2 Tbsp millet flour
  • 1 tsp flax-seed powder
  • 1/4 tsp baking soda
  • 1/2 tsp red chili flakes
  • 2 tsp oil, plus more to grease the skillet

Directions:

pancakes
Place the green chilis, garlic and spinach in a blender. Sprinkle a bit of salt and blend them till pureed smooth. *Add water gradually as required.

pancakes1
Grate cottage cheese
pancakes2
Mix spinach puree, cottage cheese, chickpea & millet flour, flax-seed powder, chili flakes, baking soda, oil, salt and pepper in a large mixing bowl. Add water gradually till pancake-styled batter is formed.
pancakes3
Spread the ladle-full of batter on a greased skillet and spread it evenly. You can keep the size as per your comfort zone. See the color?!! 🙂

pancakes4
Turn them very carefully after 2-3 minutes of cooking on one side over a medium flame.
pancakes5
Serve them simply with tomato ketchup or dollop-full yogurt along with a bowl of soup or as is!

*Note:

You can have number of variations with this recipe:

  1. You can add a bunch of mint leaves along with spinach for added freshness and zing.
  2. You can add grated carrots and/or boiled corn in the batter.
  3. You can use these pancakes as a base and make a mix-vegetable filling or egg filling to stuff it with.

Possibilities are endless! So keep thinking and improvising!

Enjoy!!! 🙂

Share this recipe:

Low-fat Mango Banana Nut Bread

Low-fat Mango Banana Nut Bread2

Its summer time and it always bring back the fond memories of my childhood. Thoughts of leisurely spent summer holidays, visits to my grandparents’ house, having fun with the cousins and eating lots n lots of MANGOES gets me nostalgic!!!

We Indians pride ourselves on our mangoes. All the variations we get throughout the country, the most delish of ‘King of Fruits’ is Alphonso from Ratnagiri. (According to me, of course!) And in today’s recipe I have used premium quality Alphonso mangoes.

If there is one thing I would never get tired of eating my whole life, it is MANGO!!! Not chocolate, cookies or ice-cream. Not Margarita pizza (loveee!!), not Oreo Milkshake (obssessed!!!), not Blueberry Cheesecake (I swear!!!!) or even Pasta. Nope, none of these things are even in same proximity as my questionably crazy love for mangoes.

And when mangoes joined forces with some toasted coconut, over ripe bananas and walnuts… well, it’s safe to say that it will be a KILLER recipe!

Mangoes being super-juicy and super-ripe bananas being super-sweet, the end result is quite moist and sweet (even without adding too much sugar). So mangoes in the form of low-fat loaf… what can I say! All in all it’s a win-win! 🙂

In addition to the fresh mangoes, I added super-creamy secret ingredient: Low-fat Mango Yogurt! The thick, luscious yogurt gives the bread an unbelievably soft texture. So much that each bite practically melts in your mouth.

This bread has THRICE the mango flavor from fresh mangoes, mango yogurt AND fresh mango puree. Yes! To omit the eggs from the bread I decided to use mango puree and made it even more MANGOLICIOUS!!!

I added walnuts in the loaf to give it a crunchy texture. They pair quite well with the mangoes actually. You can easily replace the walnuts with the white chocolate-chips (recipe on sally’s baking addiction). Its will be a heavenly combo! But I am trying to make a low-fat version here so I am stuck with walnuts. Not that I am complaining! 😛

As if the fresh mangoes, mango yogurt, mango puree and ripe bananas weren’t enough, I sprinkled the loaf with the desiccated coconut. The coconut gets toasted in the oven and provides a pleasant, almost-caramelized coating on the top. Plus, it gives pretty snow-flaked effect.. no? 😉

Low-fat Mango Banana Nut Bread3

Cut the slices nice and thick and gobble it up!!!

So what are you waiting for? This recipe is a MANGO BONANZA!!!

Preheat your oven right away!!!

*Be sure to read the recipe entirely before making, coconut is added mid-baking – not when you first put the loaf in the oven.

Ingredients:

  • 2 cups whole wheat flour
  • 1 tsp ground cinnamon
  • ¾ tsp baking soda
  • ½ tsp salt
  • 1/3 cup plus 2 Tbsp white granulated sugar
  • 4 Tbsp unsalted butter, softened to room temperature
  • 1/3 cup mango puree
  • 1 and ½ cups mashed very very ripe bananas (about 3 bananas)
  • 1/3 cup low fat mango yogurt
  • 1 tsp vanilla extract
  • 2/3 cup chopped walnuts
  • 1 cup chopped mango
  • 2 Tbsp shredded desiccated coconut

Directions:

  1. Preheat oven to 350F/180C. Grease 9×5-inch loaf pan with oil.
  2. In a medium bowl, whisk together the flour, cinnamon, baking soda and salt. Set aside.
  3. In a separate large bowl, beat the sugar and butter with stand or handheld mixer on medium speed until well-blended – about a minute.
    Add the mango puree, mashed bananas, yogurt, and vanilla. Continue beating until blended.
  4. Slowly stir in the flour mixture by hand, until ‘just combined’ – do not overmix.
    Fold in walnuts and then gently stir in the chopped mangoes. You may sprinkle a few mango pieces and walnuts on top for looks as well.
  5. The batter will be very thick, so spoon it into prepared pan rather than pouring it. Bake for 30 minutes. Remove and sprinkle with shredded coconut. Bake for 25-30 minutes longer or until wooden toothpick inserted in center comes out clean. My bread took exactly 60 minutes.
    Cool 15 minutes in the pan on a wire rack. Remove from pan and cool completely on the wire rack.
Share this recipe:

Cheesy Broccoli Bites

Broccoli Bites3


Hello beautiful people,

I hope you all had an awesome weekend. I personally had a very enjoyable Sunday (I have a working Saturday 🙁 ). But on Sunday, my hubby’s few friends and us got together for a brunch and played Pool, Dumb Charades etc. and it was whole lotta fun!!! And then my Monday Blues started (can u blame a girl???).

So coming to last weekend, I was too tired after work on Saturday to cook anything elaborate for dinner and too finicky to eat out or order in! Plus there was a broccoli head staring at me in fridge from last week and I hate wasting/throwing any form of food. Hence I thought of making this eezee-peezee appetizer and decided to serve it over Tomato & Red Pepper Soup.

It turned out to be an amazing combo!

Posting my recipe for Tomato & Red Pepper Soup is a tale for another time (I know you can’t wait but plzz wait!!!). So here comes the recipe of yummilicious Cheesy Broccoli Bites!

Ingredients:

  • 250 gms fresh broccoli head, cut into florets and steamed
  • 100 gms grated white cheddar cheese
  • 2 eggs
  • salt and pepper
  • 1 tsp dried thyme
  • 1/2 tsp garlic powder
  • 1/2 cup breadcrumbs

Directions:

Cut broccoli into big florets. Let it steam for 2 minutes and then chop it finely.

Broccoli Bites1
Mix all the ingredients together in a large bowl.


broccoli Bites
Form small patties with your hands and lay on a greased parchment lined baking sheet.

Bake at 375F/190C for 30 minutes, turning the patties after the first 15 minutes.

Broccoli Bites2
Serve it hot with accompaniment of your choice. They taste great with soup, salad or as is with tomato ketchup! 😉

P.S. You can also serve these with the homemade low-fat Ranch dressing from this recipe: http://cookbybook.wordpress.com/2013/04/18/veggie-shooters/

Share this recipe:

Dill and Yellow Lentil Gravy

Dill & Lentils Curry5

Hello everyone!

Today I bring to you an everyday staple yellow lentils/split grams (almost!!!) elevated to gourmet level by addition of Dill.

In olden days, dill was used in many traditional medicines, including medicines against jaundice, headache, boils, lack of appetite, stomach problems, nausea, liver problems, and much more.  Dill seeds can also be used to prepare herbal tea.

Dill is not most often used herb in Indian cooking as cilantro but has got a very strong flavor which enhances the boring yellow lentils and compliments it very well.

Dill and Yellow Lentil Gravy

Servings: 2

Ingredients:

  • 1/3 cup yellow lentils rinsed thoroughly, soaked in 1 cup water
  • 1 Tbsp oil or ghee
  • 1/2 tsp black mustard seeds
  • 5-6 big cloves of garlic, finely chopped
  • 2-3 green chillis, finely chopped
  • 1 big red onion, chopped finely
  • 1/2 tsp turmeric powder
  • 1 bunch of dill, washed and finely chopped with stems removed
  • lemon juice from 1/2 lemon
  • 1 tsp Indian Garam Masala powder
  • salt to taste
  • spring onions, finely chopped, to garnish

Directions:

Cook the lentils in pressure cooker for 10-15 minutes until soft. Do not mash them.

Heat the oil or ghee in a deep skillet and add the mustard seeds and cover it.

Dill & Lentils Curry
Once the mustard seeds stop popping, add garlic and green chillis and saute’ for 1 minute.
Dill & Lentils Curry1
Add onions to this and saute’ till they turn translucent.
Dill & Lentils Curry2
Now add turmeric powder. Later add dill and salt, cover and cook for 2-3 minutes.
Dill & Lentils Curry3
Mix the cooked yellow lentils with the onion and dill mixture.                              Add garam masala and cook for 2-3 minutes more.
Dill & Lentils Curry4
Add lemon juice just before serving and garnish with spring onions.             Enjoy it with roti/chapati or plain rice!


Share this recipe:

Skinny Cherry Banana Muffins

Cherry Banana Cupcakes1

I know I knowwww.. I bake all the time!  Anyone who knows me know about my love for baking & eating baked stuff!!! In fact, if you keep following me here, you might as well believe this to be a baking blog!! 😀

So after disguising myself behind the first 2 posts of salad and appetizer, I decided to come out with this skinny cherry banana muffin recipe.

If you like to kick-start your day with something sweet then these muffins are just what you want! I love muffins and making them a teensy bit healthier is so easy to do. I love to bake them in a small batch of 6 to last me for a couple of days. I can grab one on the way to work and later snack on one after I get home. They are pretty convenient and I don’t feel guilty at all digging in. 😉

Cherry Banana Cupcakes2

Healthy recipes that do not taste healthy at all is like finding a treasure!

I loooveee helthifying recipes as that is the only way I can have them too much! 😛 Plus, these muffins are insanely easy to make. If they weren’t, you can bet all your money that I wouldn’t have baked them on a weekday! Oh yeah, they are that easy and quick to whip up!

Start with some of your wet ingredients: unsweetened Applesauce, some sugar, mashed banana, low-fat buttermilk and vanilla extract. Applesauce is taking the place of butter and oil in this recipe as there is simply no need for the added fat. And min you, if you think these are gonna be dry and crumbly without butter and egg then you are mistaken! I can’t stress enough that these are NOT anything like that. All the wet ingredients mentioned above do a fine job of keeping the baked muffins soft, tender and moist.

There is only 1/4 cup of white sugar in the whole recipe, yielding 6 large muffins. So you get my point when I am repeatedly saying these are extremely healthy and still decadent tasting!

The dry ingredients are simple: whole wheat flour, quick-cooking oats and your leavening agents. You can sift the flour before mixing it with wet ingredients. This step is not necessary and you can skip it.

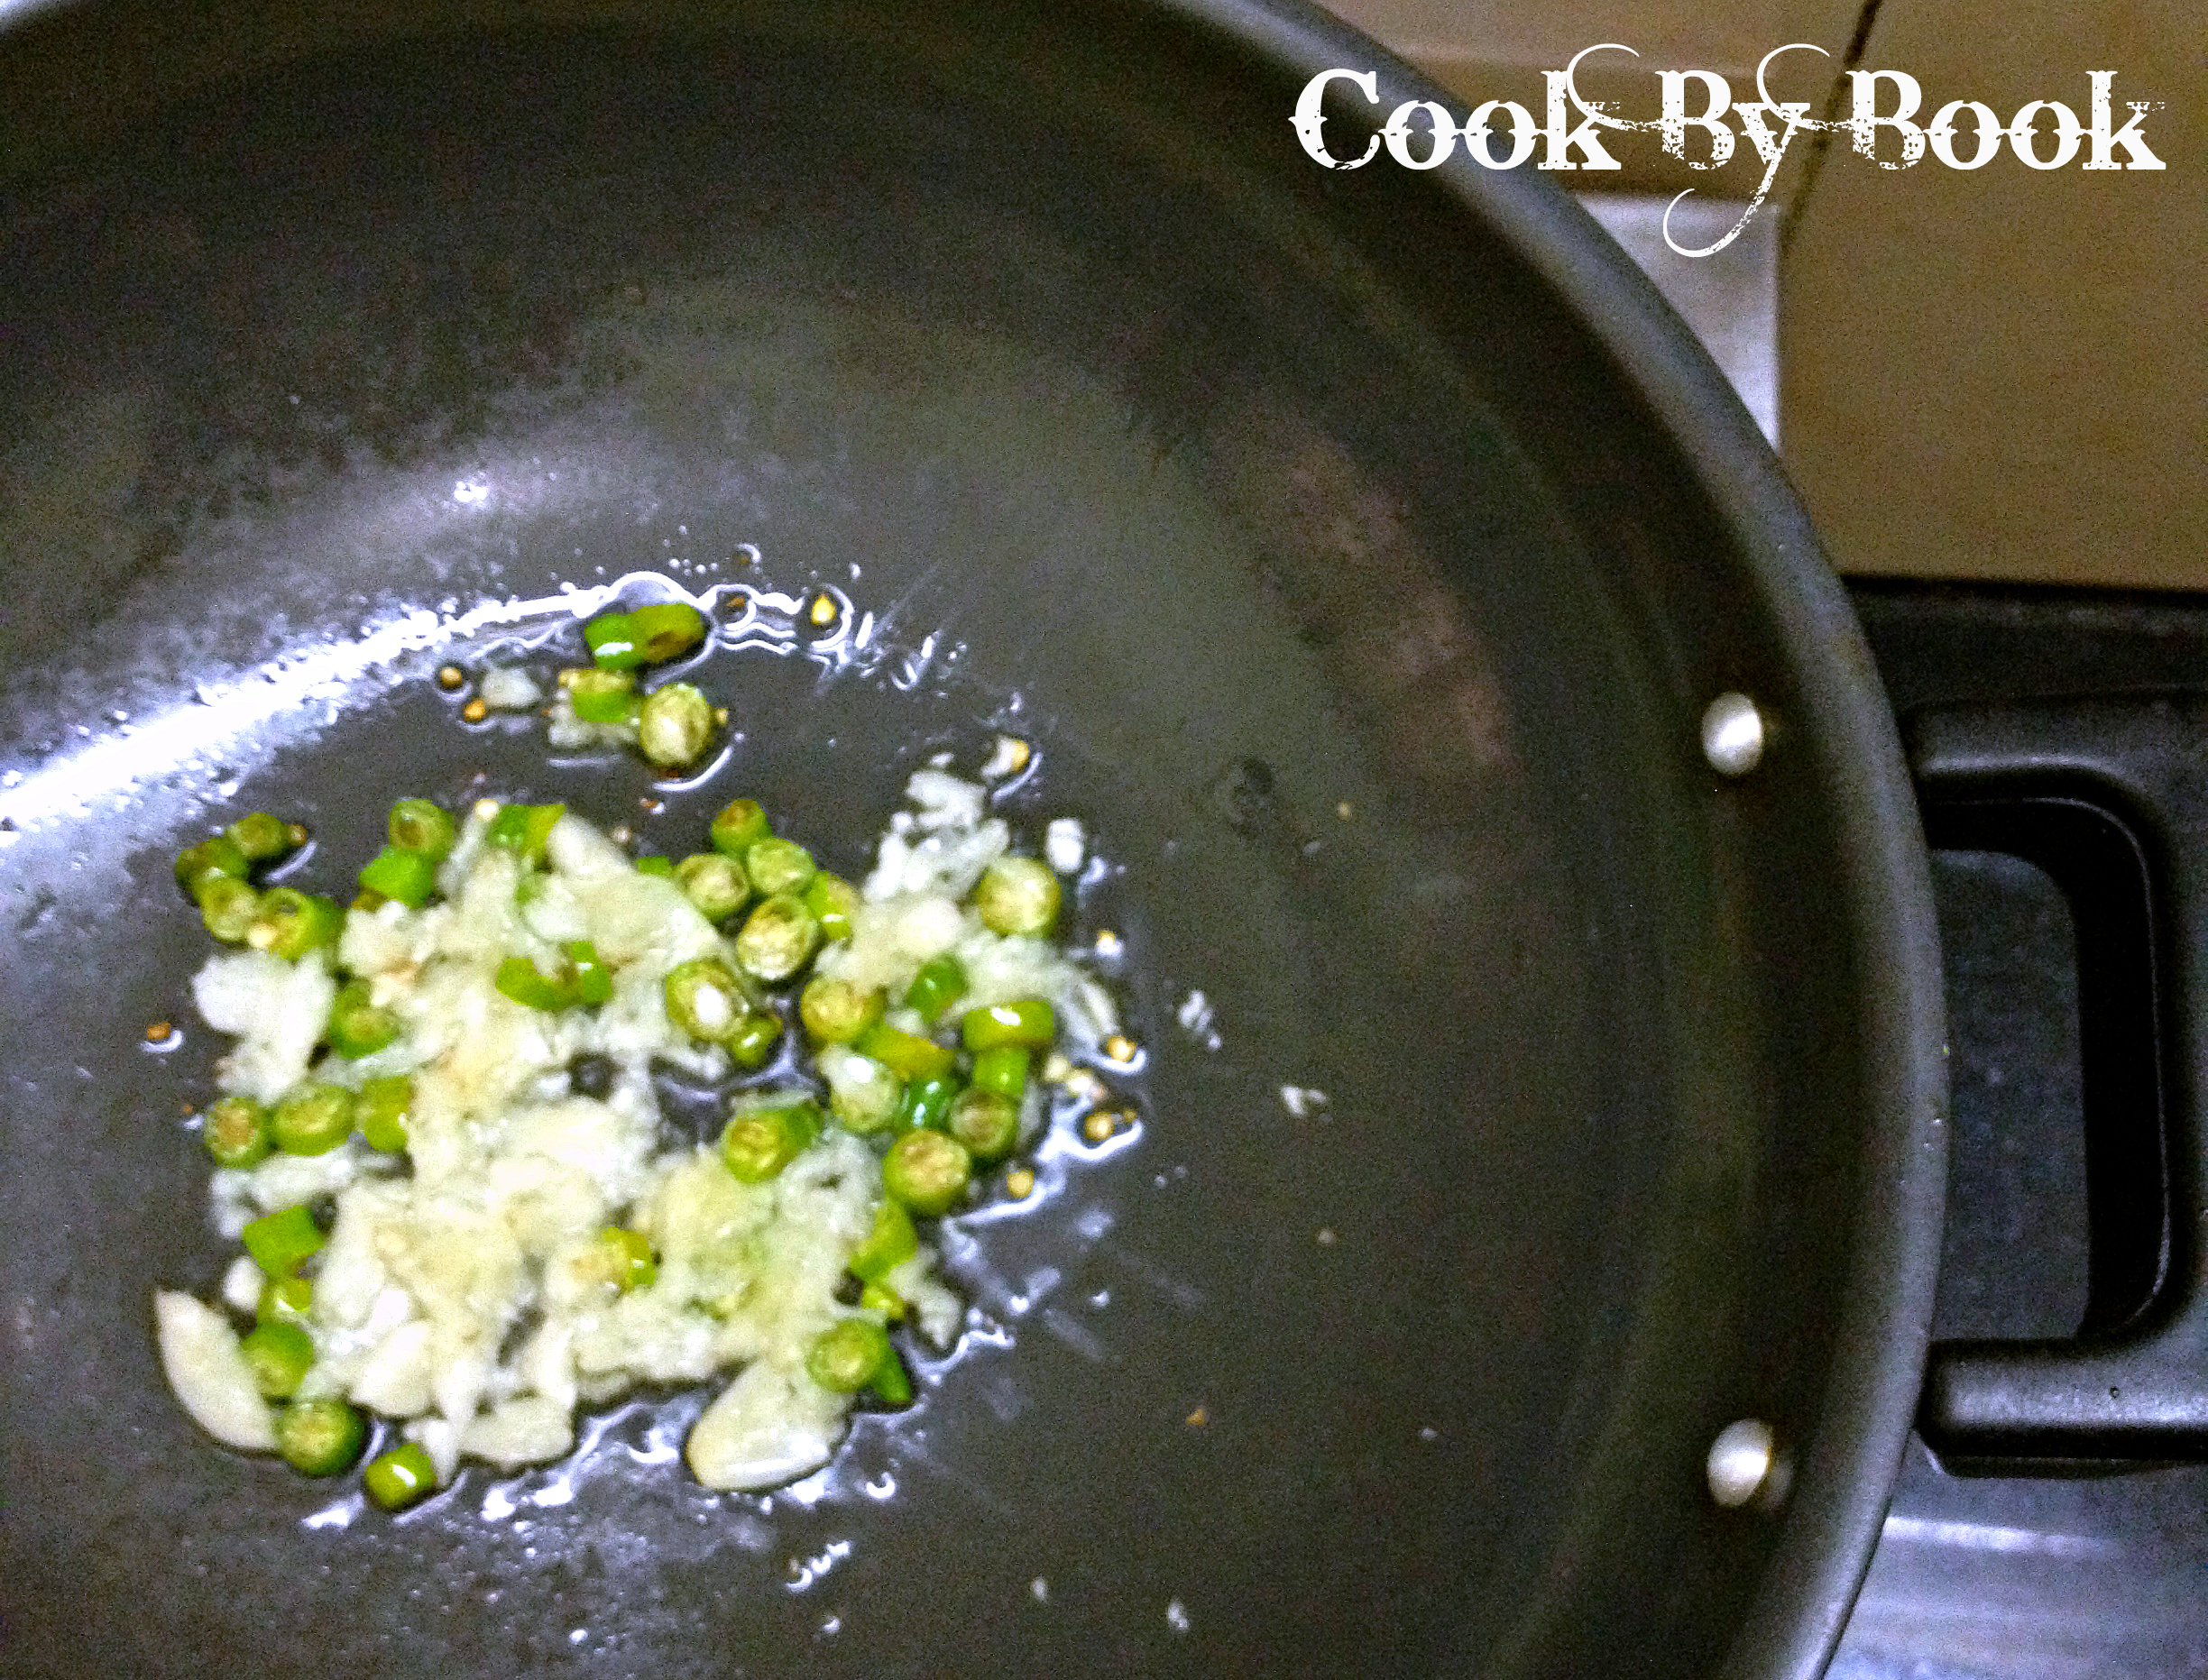
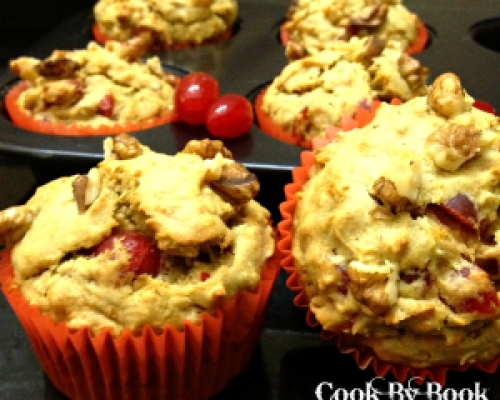
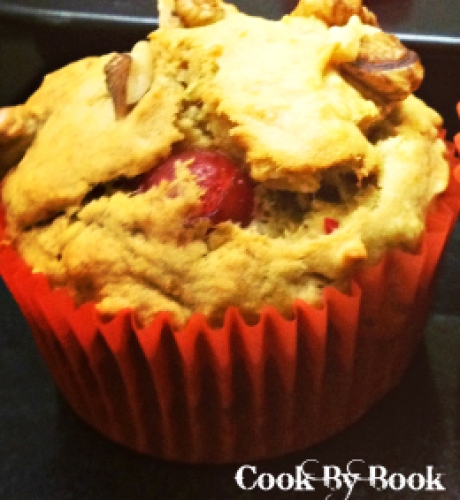
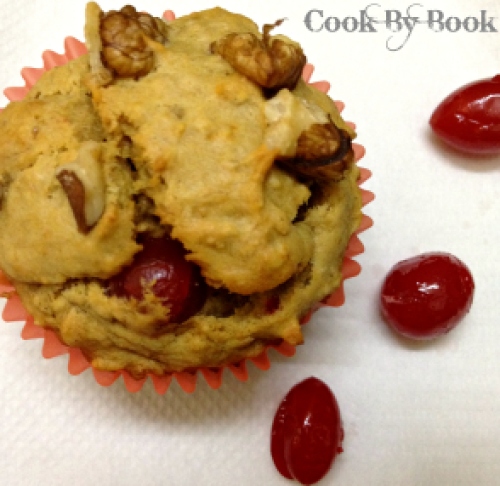
And the last thing you add? Cherries of course! I used glazed cherries cut into bite size pieces but you can easily replace them with fresh or canned cherries. Plus, a sprinkle of walnuts just before popping them into oven.

Cherry Banana Cupcakes

These muffins taste great with the cup of milk or coffee!

The muffins take an easy 18-20 minutes in the oven. Mine took 20 minutes. Be careful with these though, you don’t want to overbake them, which will lead  to dry, course muffins. Insert a toothpick in one at the 18 minutes mark. If it comes out clean, they are ready. If not, bake for 2 more minutes.

Today’s recipe is perfectly healthy and quick to prepare as no mixer required,  practically taking 10 minutes to prepare the batter. Okay, I’m done convincing you. Make these!! 🙂

Skinny Cherry Banana Muffins

Ingredients:

  • 1/2 cup Applesauce
  • 1/4 cup sugar
  • 1 medium over ripe mashed banana
  • 1/4 cup low-fat buttermilk
  • 1 tsp vanilla extract
  • 1 cup whole wheat flour
  • 1/4 cup quick-cooking oats
  • 1/2 tsp baking soda
  • 1/8 tsp salt
  • 15-20 glazed cherries, chopped into bite size pieces
  • 2 Tbsp chopped walnuts

Directions:

  1. Preheat oven to 350ºF/180ºC. Line 6-count muffin pan with liners.
  2. In a large bowl, combine apple sauce, sugar, mashed banana, buttermilk and vanilla. Whisk them all together until smooth.
  3. In a small bowl, combine the flour, oats, baking soda and salt. Slowly stir in to the wet ingredients , being careful not to overmix. Get any dry pocket of flour out. Fold in the cherries. The batter will be smooth but not too runny.
  4. Fill paper-lined muffin cups three-fourths full. Sprinkle with walnuts. Bake for 18-20 minutes or until a toothpick inserted comes out clean.
  5. Remove them from the oven and allow them to cool for 5 minutes before removing them from pan to a wire rack to cool completely.

Recipe source: http://cookbybook.wordpress.com

Share this recipe: